Mobile Integration
Integration of Apple Pay for Mobile has three steps. The initial steps for registering your Apple Merchant ID and creating Apple Pay certificates are common to all integration methods. After completing these prerequisites, you can follow the specific steps for your chosen programming language to enable Apple Pay and create a smooth, secure payment experience for your users.
Integrating Apple Pay into your mobile application can be achieved using one of the following approaches, based on your preferred development language:
- Objective-C
- Swift
- React Native
- Flutter
This guide provides a step-by-step approach for each language, ensuring you can easily select and implement the method that aligns with your app's requirements and technical stack.
Step 1: Registering Your Apple Merchant ID
To process Apple Pay transactions, you must register an Apple Merchant ID through the Apple Developer site. Below, you will find instructions for this procedure.
-
Go to the Apple Developer Dashboard and log in to your account.
-
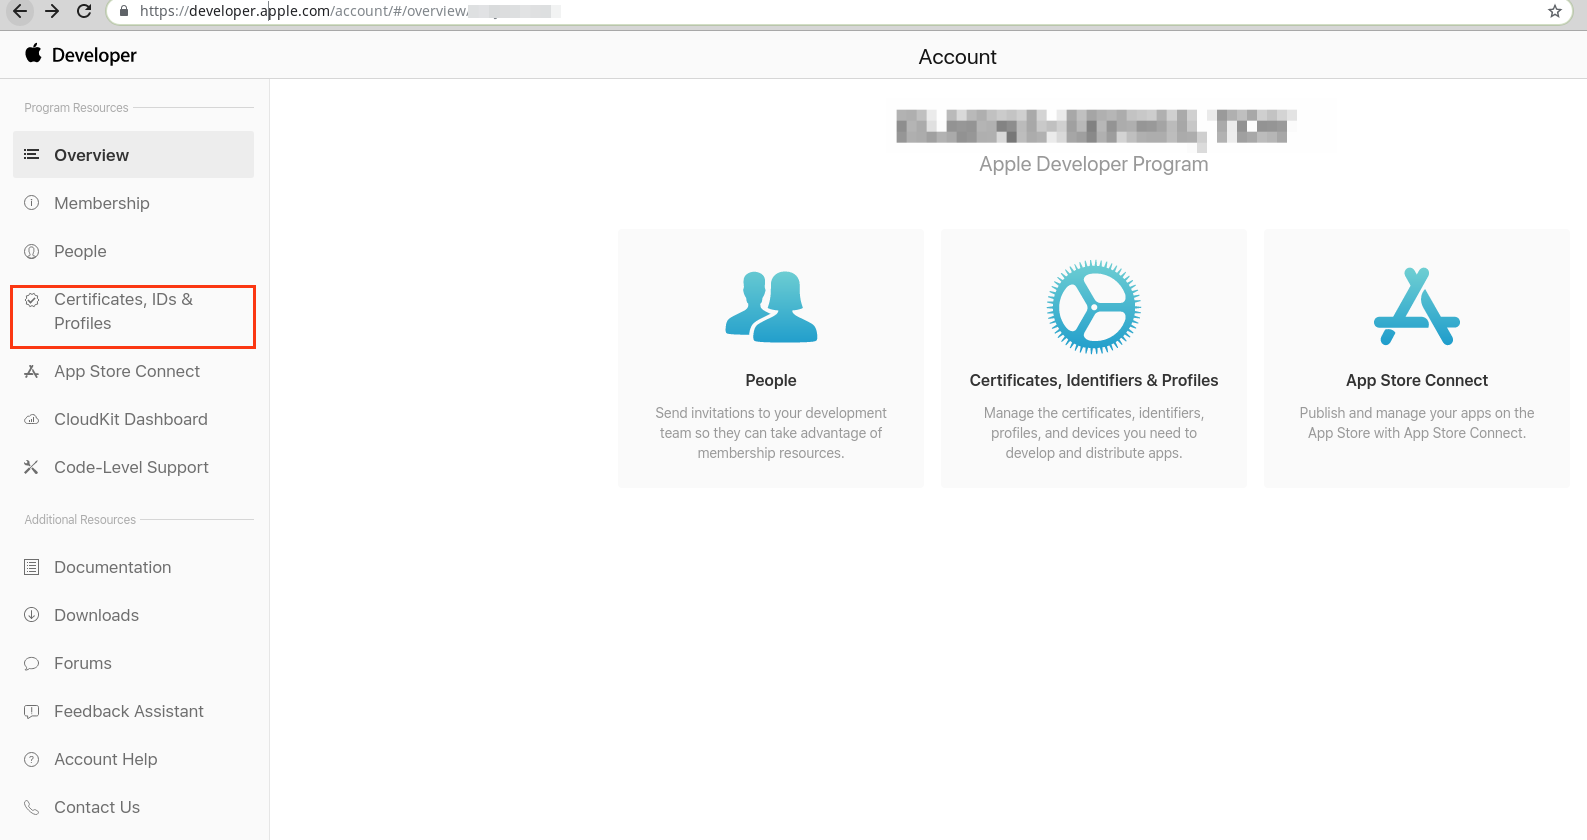
Navigate to Certificates, Identifiers & Profiles from the sidebar menu. You can access this option directly here.
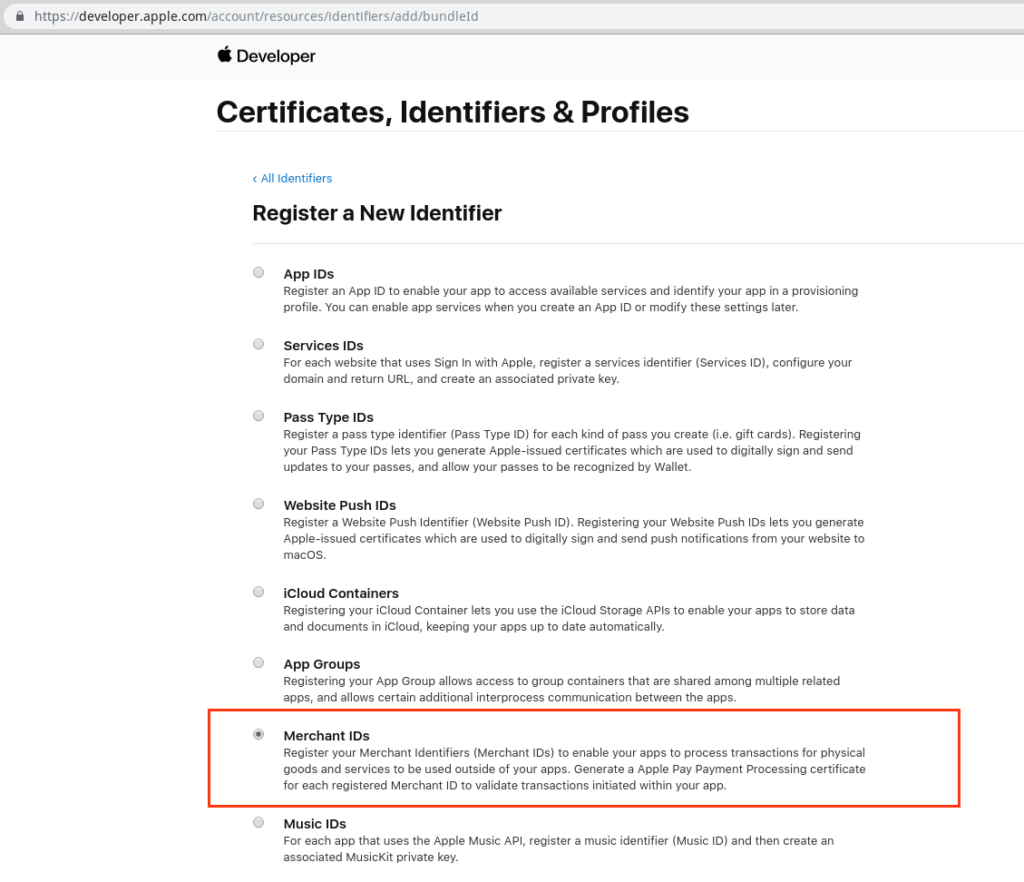
- In the Identifiers section, click the + button to add a new Merchant ID. You can access this option directly here.
-
Fill out the form. We recommend using the following structure:
- Description: Provide a name for your Merchant ID. This is for your internal reference and can be changed later. For clarity, we recommend using the name of your mobile application.
- Identifier: This value must be unique across all Apple applications. Once set, it cannot be modified, though you can create a new Merchant ID if needed. We suggest the format
merchant.fondy.eu.{{Your_app_name}}. Make sure to save this identifier for future use.

Step 2: Creating a New Apple Pay Certificate
To enable Apple Pay in your application, you must generate and manage certificates to encrypt payment data. This involves creating Certificate Signing Request (CSR) files and using them to develop the required certificates through your Apple Developer account.
Generating Certificate Signing Request (CSR) Files
Using Keychain Access on macOS
- Open Keychain Access.
- Navigate to Certificate Assistant and then to Request a Certificate from a Certificate Authority.
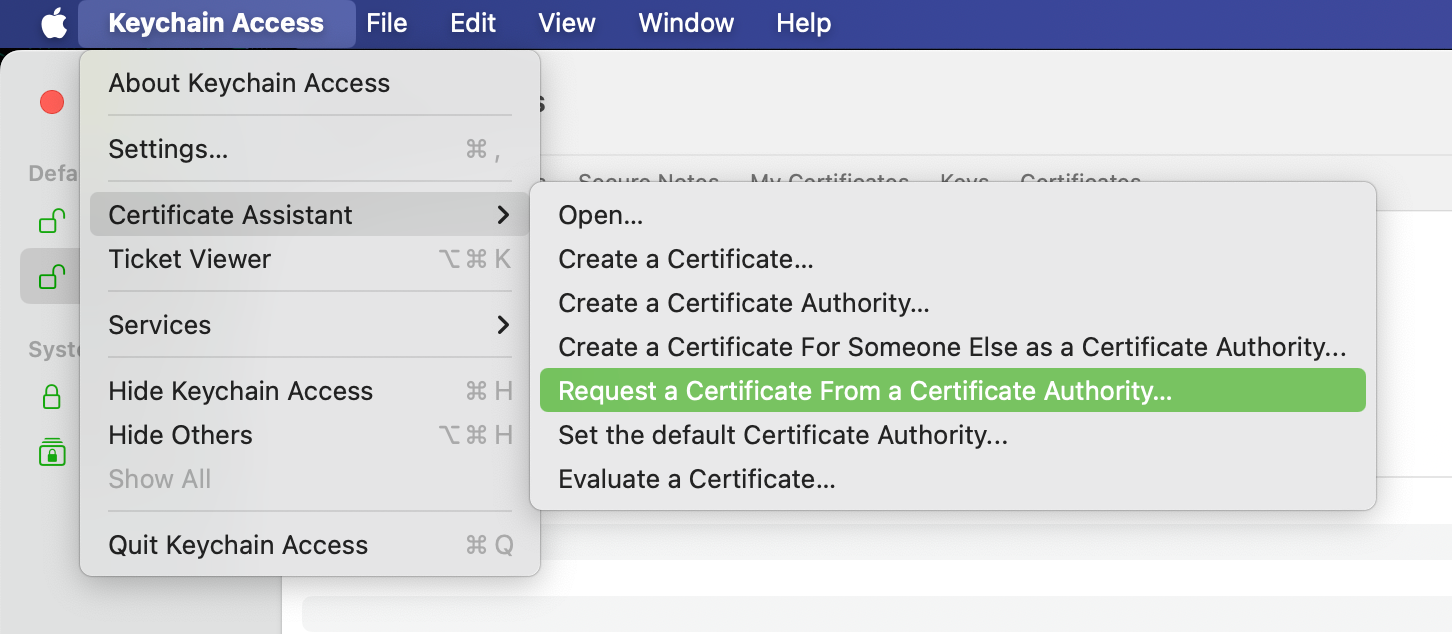
- Follow the instructions to save the CSR files locally.
Using openssl on Other Platforms
For non-macOS platforms, use the following commands to generate CSR files:
- To generate the Apple Merchant Identity Certificate:
openssl genrsa -out merchant.key 2048
openssl req -new -key merchant.key -out merchant.csr
- To generate the Apple Processing Certificate:
openssl ecparam -out processing.key -name prime256v1 -genkey
openssl req -new -sha256 -key processing.key -nodes -out processing.csr
Using CSR Files to Create Certificates
Log in to your Apple Developer account and follow these steps to generate the required certificates:
-
Navigate to Certificates, Identifiers & Profiles in your account.
-
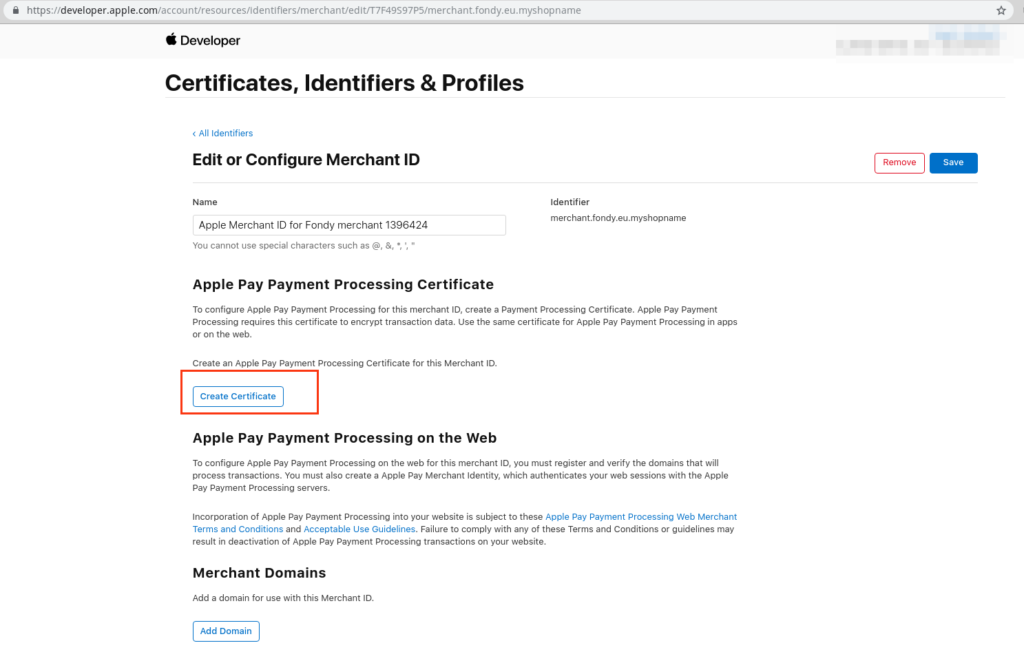
Upload the respective CSR files to create each certificate:
-
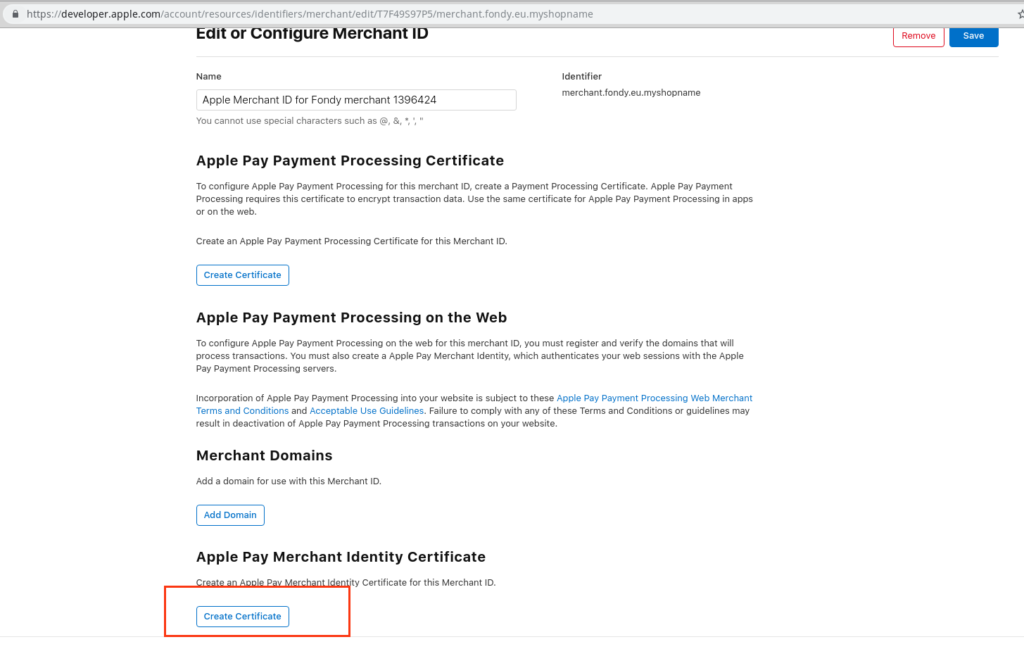
Apple Pay Payment Processing Certificate: Upload the processing.csr file and download the generated certificate.
-
Apple Pay Merchant Identity Certificate: Upload the merchant.csr file and download the generated certificate.
-
Sharing Certificates with Fondy Support
After downloading the certificates, send them to Fondy Support to finalise the integration and ensure they are correctly configured.
Step 3: Adding the Apple Pay Feature to Your Application
The final step in integrating Apple Pay is configuring your application to use the Apple Pay feature. This involves enabling Apple Pay in Xcode and linking it to the Merchant ID you registered earlier. Additionally, you will integrate the Fondy SDK to handle transactions. Follow these steps to complete the setup for Objective-C and Swift iOS, React Native, and Flutter applications.
iOS (Objective-C)
You can find the latest version of the SDK in our repository.
Open your project in Xcode and follow these steps to enable Apple Pay in Xcode:
-
Go to your project's settings.
-
Select the Capabilities tab.
-
Turn on the Apple Pay switch. You may be prompted to log in to your Apple Developer account.
-
Check the box next to the Merchant ID you created in Step 1.
-
Add the generated Merchant ID to the Fondy SDK in two locations:
-
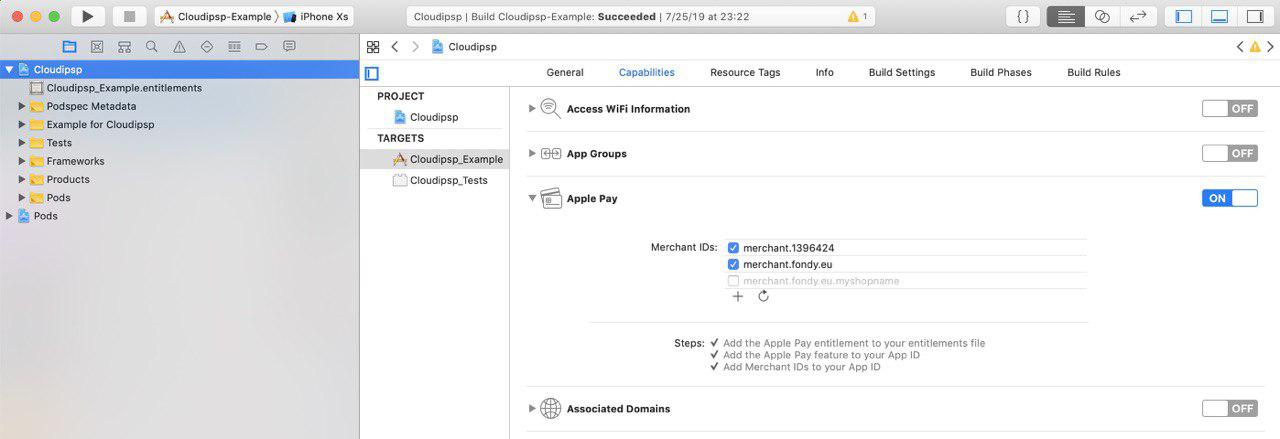
Xcode Settings: Navigate to Xcode, then Target, Capabilities, Apple Pay, Merchant IDS and add the Merchant ID.
-
Integration SDK: Update the SDK constructor with the
merchant_idobtained during registration in the Fondy Merchant Portal. Replace the placeholder1396424with your Merchant ID. Below you can find an example of the code line that you should update:self.api = [PSCloudipspApi apiWithMerchant:1396424 andCloudipspView:self.webView];
-
For iOS (Swift)
You can find the latest version of the SDK in our repository.
Open your project in Xcode and follow these steps to enable Apple Pay in Xcode:
-
Go to your project's settings.
-
Select the Capabilities tab.
-
Turn on the Apple Pay switch. You may be prompted to log in to your Apple Developer account.
-
Check the box next to the Merchant ID you created in Step 1.
-
Add the generated Merchant ID to the Fondy SDK in two locations:
-
Xcode Settings: Navigate to Xcode, then Target, Capabilities, Apple Pay, Merchant IDS and add the Merchant ID.

-
Integration SDK: Update the SDK constructor with the
merchant_idobtained during registration in the Fondy Merchant Portal. Replace the placeholder1396424with your Merchant ID. Below you can find an example of the code line that you should update:<textField opaque="NO" contentMode="scaleToFill" contentHorizontalAlignment="left" contentVerticalAlignment="center" text="1396424" borderStyle="roundedRect" placeholder="Enter merchant id" textAlignment="natural" minimumFontSize="17" translatesAutoresizingMaskIntoConstraints="NO" id="8pz-e9-tsn">
-
For React Native
You can find the latest version of the SDK in our repository.
For React Native applications, configure Apple Pay as follows:
-
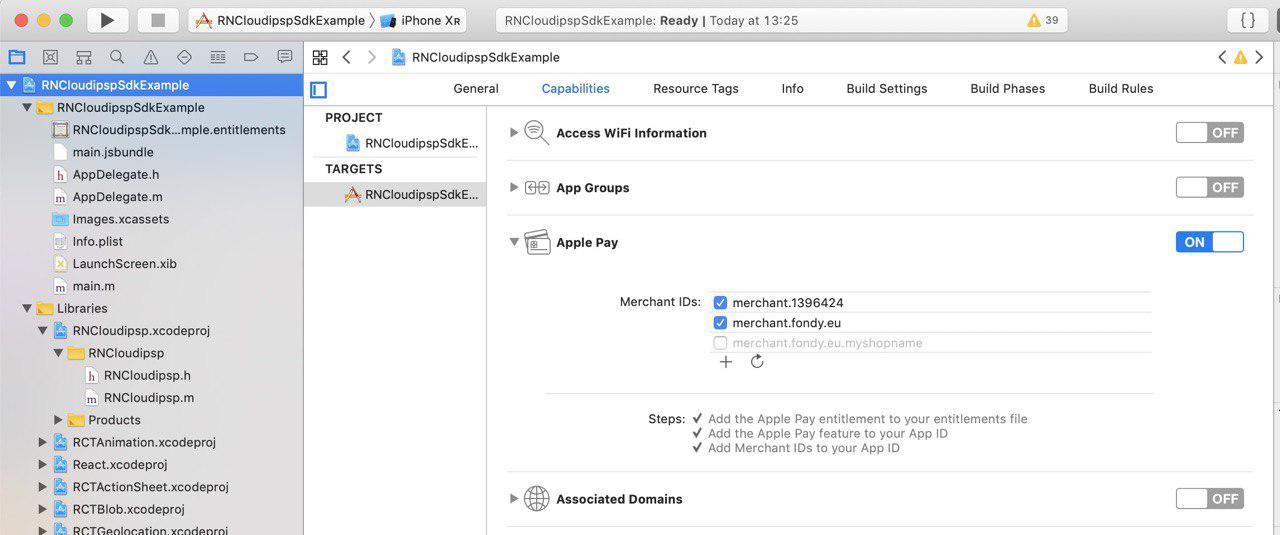
Xcode Settings: Navigate to Xcode, then Target, Capabilities, Apple Pay, Merchant IDS and add the Merchant ID.
-
Integration SDK: Update the SDK constructor with the
merchant_idobtained during registration in the Fondy Merchant Portal. Below you can find an example of the code line that you should update:this.api = new Cloudipsp(<your Fondy merchant_id>, this.cloudipspWebView);
For Flutter
You can find the latest version of the SDK in our repository.
For Flutter applications, configure Apple Pay as follows:
-
Xcode Settings: Navigate to Xcode, then Target, Capabilities, Apple Pay, Merchant IDS and add the Merchant ID.
